Picture this: you’re about to head out on a road trip, or maybe just your daily commute, and your car starts making a strange noise. You pull over, pop the hood, and realize you have no idea what you’re looking at. Sound familiar? You’re definitely not alone.
One of the most basic yet overlooked parts of car maintenance is checking your oil regularly. It’s the kind of task that sounds intimidating if you’ve never done it before, but trust me, it’s a lot simpler than you think. Using a car oil checker, which is really just the dipstick already built into your engine, takes less than five minutes and can save you from some seriously expensive repairs down the road.
In this guide, we’re going to walk you through the entire process step by step. By the time you finish reading, you’ll know exactly how to check your oil level, what the results mean, and when it’s time for a change. No mechanical experience needed, no special tools required. Just you, your car, and a little confidence. Let’s get started!
What Is a Car Oil Checker and Why Does It Matter
A car oil checker isn’t one single thing. It’s actually a category that covers three different tools, and knowing which one applies to your vehicle makes a real difference.
The most common is the traditional dipstick, a physical rod fitted to virtually all petrol and diesel engines. You pull it out, wipe it clean, reinsert it fully, pull it again, and read the oil level against the marked minimum and maximum indicators. Simple, reliable, and it also gives you a quick visual on oil condition: fresh oil looks amber or light brown, while dark, gritty, or milky oil tells you something is wrong.
The second type is the electronic oil level sensor, now fitted to many modern vehicles. Instead of a dipstick, your dashboard displays the oil level directly, usually on startup. Convenient, yes, but not foolproof. If the sensor fails, you may get no warning at all, which is worth keeping in mind.
The third type is a handheld oil condition tester, a small device that assesses oil degradation rather than just quantity. These are particularly useful for performance and track vehicles where oil can degrade faster than the mileage intervals suggest.
It’s also worth being clear on scope: this guide applies to petrol, diesel, and hybrid vehicles only. Electric vehicles don’t use engine oil, so this check simply doesn’t apply to them.
So why does any of this matter beyond just topping up? Engine oil does three jobs: it lubricates moving components, helps cool the engine, and cleans away deposits and contaminants. Run low or neglected oil through a modern engine and you’re looking at serious, potentially irreversible damage. The RAC puts it plainly: running low on engine oil could cost you thousands in repairs.
For turbocharged, high-revving, or track-driven engines, the stakes are even higher. These engines run hotter and place far greater stress on oil than a standard commuter car, accelerating both consumption and degradation. Regular checks aren’t optional here; they’re essential maintenance.
With running costs rising in 2026, more drivers are holding onto their vehicles longer rather than upgrading. Routine oil checks are one of the cheapest and most effective ways to protect that investment. Consumer Reports recommends checking your engine oil regularly as a core ownership habit, and it’s easy to see why: a few minutes of checking could save you from a repair bill that runs into thousands.
What You Need Before You Start
Before you pick up that dipstick, it pays to have a few basics in place. Getting these sorted beforehand means the whole process takes a few minutes rather than turning into a frustrating back-and-forth trip to the garage.
A clean lint-free cloth or paper towel is the one thing most people forget, and it’s actually the most important item on this list. You need to wipe the dipstick clean before taking your reading, otherwise you’re just seeing oil that’s been splashed around during normal engine operation rather than the true level sitting in the sump. A white or light-coloured cloth makes a real difference here too, because engine oil can be surprisingly hard to see against a dark dipstick. Check out this beginner’s guide to checking your oil level properly for a visual walkthrough of exactly why the wipe step matters.
Your vehicle handbook is your second essential. It confirms the exact oil specification your engine needs, including ACEA ratings and OEM approvals specific to your manufacturer. Ford, BMW, and Vauxhall performance variants all have their own approved specifications, and using a close approximation rather than the correct grade can cause real damage over time, particularly in turbocharged engines running higher thermal loads.
The right engine oil should be on hand before you start, not sourced afterwards. Performance and turbocharged engines almost always require a fully synthetic oil; fitting a mineral or semi-synthetic is a false economy that accelerates wear.
Safety first: engine off, parked on a level surface, and cooled for at least five to ten minutes. A hot engine gives a falsely low reading because oil expands with heat and much of it is still circulating. It also creates a genuine burn risk from hot components and oil vapour.
Finally, grab a torch or use your phone light. Tight engine bays on performance hatches and sports cars are genuinely difficult to see into clearly, and good lighting helps you read that dipstick accurately every time.
How to Check Your Engine Oil: Step by Step
Now that you’ve got everything prepped, here’s exactly what to do. Follow these steps in order and you’ll get an accurate, reliable reading every time.
Step 1: Park on level ground
This one sounds obvious, but it’s easy to overlook. If your car is parked on even a slight slope, gravity pulls the oil to one end of the sump, which means your dipstick reading will be off. Find a flat surface before you do anything else. It’s also worth letting the engine cool down for at least ten minutes after driving, so the oil settles back into the sump and you avoid any risk of burns.
Step 2: Locate the dipstick
Pop the bonnet and look for a brightly coloured handle, usually yellow or orange. It’s typically positioned towards the front of the engine bay. If you can’t spot it straight away, check your owner’s handbook. Worth knowing: some newer vehicles don’t have a physical dipstick at all and instead use an electronic oil level monitor on the dashboard. If that’s your car, consult the handbook for how to read it correctly.
Step 3: Remove, wipe, reinsert, and re-read
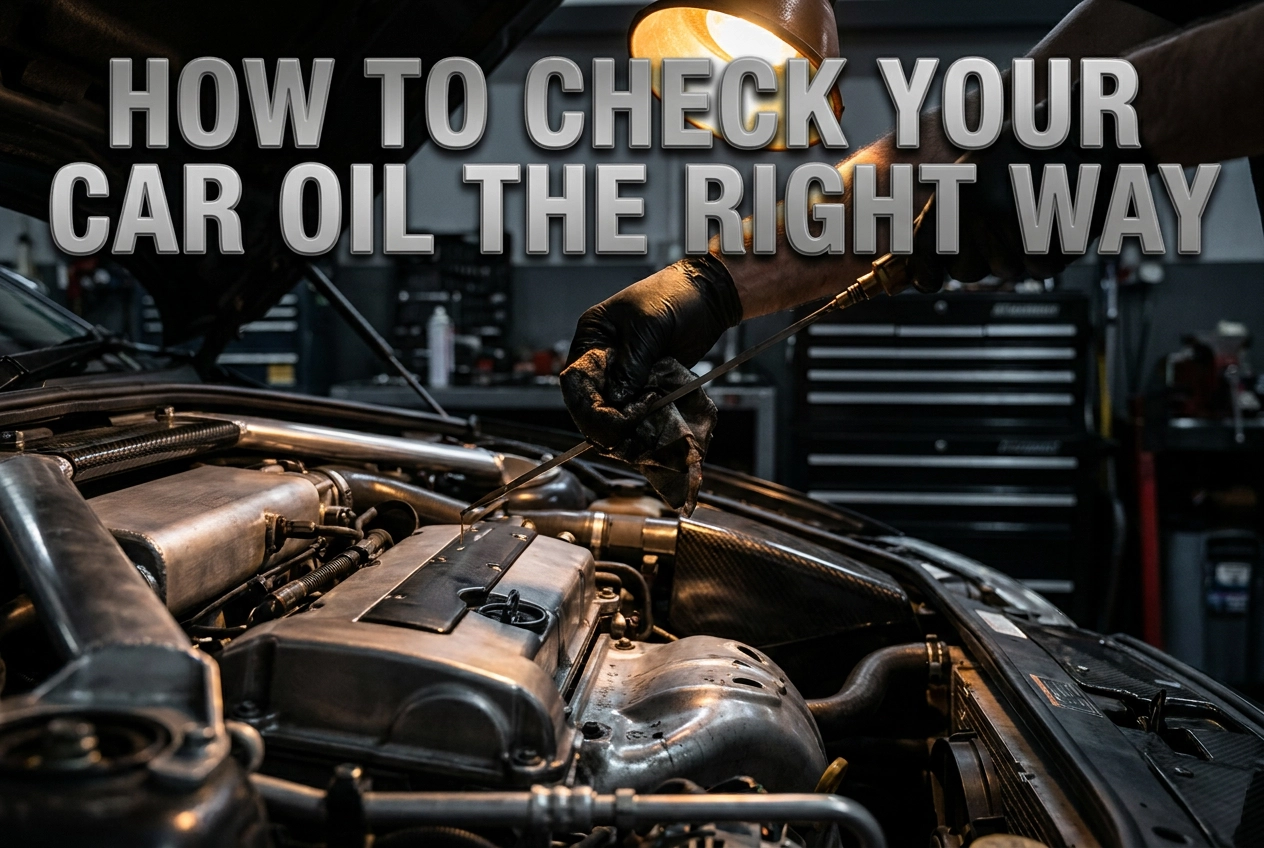
Pull the dipstick out fully and wipe it clean with a lint-free cloth or paper towel. Then reinsert it all the way back into its tube and pull it out again. That second pull gives you the accurate reading. Skipping the wipe and reading on the first pull is the most common mistake beginners make; it only tells you there’s oil in there, not how much. This easy visual guide to checking your dipstick is helpful if you’d like to see the process in action.
Step 4: Read the oil level
Your dipstick has two markers, a minimum and a maximum. The oil film should sit between these two marks. Anywhere in that range is fine. If it’s at or below the minimum mark, you need to top up straight away. Running low on oil risks serious engine damage.
Step 5: Check the oil condition
While the dipstick is out, look closely at the oil itself. Fresh fully synthetic oil is typically a clear amber or golden colour. If it’s dark brown or black, the oil has degraded and is likely due for a change. A milky or creamy appearance is a more urgent warning sign, potentially indicating coolant has mixed with the oil. If you see that, stop driving and get it investigated by a mechanic as soon as possible. For a deeper look at how to check your oil condition, Car and Driver covers what different colours mean in useful detail.
Step 6: Replace the dipstick securely and close the bonnet
Push the dipstick firmly back into its tube until it’s fully seated. A loose dipstick can cause oil to spray around the engine bay when the engine runs, which creates a messy and potentially damaging situation. Once it’s secure, close the bonnet properly and you’re done.
Reading Your Results: Should You Top Up or Change the Oil
Once you’ve pulled the dipstick and had a good look, you need to know what to actually do with that information. Here’s how to interpret what you’re seeing and take the right action.
Your Oil Looks Good, Level Is Fine
If the oil sits between the minimum and maximum markers and has a clean, amber colour, you’re in great shape. No action needed right now. Just grab your phone and note down today’s date, then set a reminder to check again in a month. Building this habit means you catch any developing issues early, before they turn into expensive problems.
The Level Is Below the Minimum Marker
This needs attention before you drive anywhere. Add the correct specification oil (check your owner’s manual if you’re unsure) in small amounts, then recheck the dipstick after each addition. It’s tempting to pour in a big glug and be done with it, but resist that urge. Overfilling is genuinely as harmful as running low, especially in performance engines, where excess oil can be whipped into foam by the crankshaft, stripping away its lubricating properties. Slow and steady wins here.
The Oil Is Dark, Gritty, or Black
Topping up won’t fix this. Dark brown or black oil that feels gritty between your fingers has already broken down. Its additive package is spent, and pouring fresh oil into degraded oil doesn’t restore any protection. A full drain and refill is the only correct response. According to dipstick oil analysis guidance from Machinery Lubrication, dipstick condition checks are a legitimate and widely recognised method for assessing oil quality, not just level.
Milky, Foamy, or Sweet-Smelling Oil
Stop driving immediately if you spot this. Milky or foamy oil is a classic sign of coolant mixing with the engine oil, most commonly caused by a head gasket failure. Coolant in the oil rapidly destroys engine bearings and internal surfaces. This is not a top-up situation; it requires a proper mechanical inspection before the engine is started again.
Performance and Track Use
If your car sees track days or is regularly driven hard, don’t rely solely on the manufacturer’s service interval. Fully synthetic oils degrade faster under sustained high temperatures and high RPM, so consider changing more frequently. Many performance drivers change oil after every track event as standard practice.
Always Change the Filter Too
When you do a full oil change, always replace the oil filter at the same time. A contaminated filter will push particles straight back through your fresh oil, wasting much of the benefit you just paid for.
How Often Should You Check Your Oil If You Drive a Performance Car
For standard road cars, once a month and before any long journey is the widely accepted minimum. If you’re driving a performance car, that baseline isn’t really enough. Fortnightly checks are a far more sensible starting point, given that performance engines operate at higher temperatures, higher RPM, and under greater sustained load than your average family hatchback. More frequent checks give you visibility over what your engine is actually doing between oil changes.
If you use your car on track, the rule is simple: check before every session and check again after. High-RPM operation and repeated heat cycles break down oil much faster than normal road driving. Turning up to a track day without checking your oil level and condition is the kind of shortcut that can end with a very expensive engine failure. As the saying goes in motorsport circles, nobody wants to spin a rod bearing while having fun.
Turbocharged performance cars deserve extra attention. Turbo bearings are lubricated by engine oil and run at extreme temperatures, which means your turbo engine can work through oil more quickly than a naturally aspirated equivalent. Get into the habit of checking your oil more frequently if you drive a turbocharged Subaru, BMW, or similar platform, and always carry a correctly graded top-up supply in the boot.
Older performance cars with higher mileage engines often consume more oil than newer units. Rather than guessing, build a baseline by checking consistently and logging what you find. Note the level at each check and track consumption between changes. If the rate of consumption suddenly increases, that’s an early warning worth investigating before it becomes a costly repair.
The DIY maintenance surge that started around 2020 has genuinely changed habits among enthusiast owners for the better. Building a quick oil check into your fortnightly routine takes no more than five minutes and can realistically save you hundreds, or even thousands of pounds in preventable engine damage.
Choosing the Right Oil for a Performance Engine
If you’ve got as far as knowing your oil is low or due a change, the next question is what to actually put in. For performance engines, this matters more than most drivers realise, and getting it wrong can cause serious damage over time.
Fully synthetic oil is the starting point, not a luxury upgrade. Performance, turbocharged, and high-revving engines generate heat and stress levels that conventional or semi-synthetic oils simply aren’t built to handle consistently. Fully synthetic formulations hold their viscosity under extreme temperatures, which means the protective film between moving parts stays intact when your engine is working hardest. They also flow faster during cold starts, reducing the brief but damaging period where metal components run with minimal lubrication.
Understanding viscosity ratings makes a real difference when selecting the right product. The two-number format you’ll see on every bottle, such as 5W-30 or 10W-60, tells you how the oil behaves at different temperatures. The first number (followed by “W” for Winter) describes its flow at cold temperatures; the second describes its thickness at full operating temperature. For track use or high-performance road driving, a higher second number like 10W-60 gives you a stronger protective film under sustained high-RPM conditions.
ACEA specifications are the European benchmark for oil performance categories. Published under the ACEA Oil Sequences 2023 standard, these classifications define what a given oil can actually do. Popular UK performance marques including BMW, Ford, and Vauxhall turbocharged variants each carry specific ACEA and OEM approval requirements. Using an oil that meets the right viscosity but lacks the correct ACEA category or manufacturer approval can compromise engine protection and may affect warranty validity. Always check the ACEA specifications alongside your vehicle handbook, not just the label.
A premium brand name on the bottle is not a guarantee of compatibility. Cross-reference the oil’s spec sheet directly against your handbook before buying anything. Performance Cars Parts stocks engine oils suited to performance and turbocharged applications, and shopping with a specialist means the range is already filtered toward relevant grades, which takes much of the guesswork out of the process.
Oil Checking and Its Relevance to Your MOT
Many drivers assume the MOT only really cares about tyres, lights, and brakes. Oil doesn’t come up much in that conversation, but it’s more connected to your annual test than you might think.
The MOT does not directly grade the quality of your engine oil, but oil condition and level still have a real influence on the outcome. If an MOT tester spots an active engine oil leak that poses a safety or environmental risk, that can result in a failure. Seals and gaskets that are under-pressure from consistently low oil levels are more likely to weep or fail over time, so keeping your levels topped up properly is one of the simplest ways to avoid that scenario.
Exhaust smoke is another area where oil becomes relevant. Blue or white smoke coming from the exhaust during the emissions test is a warning sign that oil may be burning inside the combustion chamber. This typically happens when oil is degraded, overly thin, or running low enough to reach places it shouldn’t. It can trigger an advisory note or an outright failure depending on severity.
The DVSA’s guidance is clear that vehicles should be roadworthy at all times, not just on the day they roll into the test centre. Regular oil checks are part of meeting that standard consistently throughout the year.
If you drive a modified or performance vehicle, there’s an additional consideration worth knowing. Certain insurance policies for modified or motorsport-registered cars require evidence of proper maintenance. Neglecting oil condition could, in some cases, affect a claim.
The good news is that a pre-MOT check that includes oil level and condition genuinely takes under five minutes using the steps covered earlier in this guide. Doing it a week before your test gives you time to top up, investigate any leaks, or book a service if something looks off, rather than finding out on the day.
Related Maintenance to Carry Out Alongside Your Oil Check
Once you’ve got the bonnet up and the dipstick in your hand, it makes total sense to run through a few companion checks while you’re there. Taking an extra five minutes can save you from missing something that matters.
Oil filter replacement is the one most closely tied to your oil check. The filter’s job is to catch contaminants before they circulate through the engine, but once it’s saturated it can’t do that job properly. Standard practice is to replace the filter every time you do a full oil change, roughly every 5,000 to 7,000 miles depending on your vehicle. Fitting fresh oil alongside a clogged old filter is a bit like pouring clean water through a dirty sieve.
Engine flush products are worth considering if you’re dealing with a high-mileage or previously neglected engine. A flush is added before you drain the old oil, and it works to break up sludge and deposits sitting in internal passages. This means the new oil goes into a cleaner system and can circulate properly from the start rather than mixing with residual grime.
Coolant level is a quick one to check while the bonnet is already open. If you ever notice your oil looking milky or pale on the dipstick, that can point to coolant contamination, which is a serious fault. Keeping an eye on both fluids together makes it easier to spot problems early.
Air filter inspection takes seconds and costs nothing. A blocked filter reduces clean airflow to the engine, which increases load and can nudge up oil consumption over time. Performance engines are particularly sensitive to this.
For anyone planning a full oil change, Performance Cars Parts stocks engine oil, oil filters, and supporting maintenance parts across a wide range of performance and turbocharged vehicle fitments, so you can source everything in one place from a specialist who understands what performance applications actually need.
Keep Your Engine Protected with Regular Oil Checks
Let’s pull everything together into a quick reference you can come back to any time. The six steps are: park on level ground, locate the dipstick, wipe and re-insert for a clean reading, assess the level against the MIN and MAX markers, assess the condition by colour and texture, then act accordingly based on what you find. That’s your entire routine, and it takes under five minutes.
If you’re running a turbocharged or performance engine, those five minutes matter even more. Higher thermal loads, faster oil consumption under boost, and tighter engineering tolerances all mean your engine is less forgiving than a standard road car. Fortnightly checks and a fully synthetic oil meeting your manufacturer’s specified grade are non-negotiable, not optional extras.
In 2026, with running costs still elevated and most enthusiasts keeping their cars longer rather than replacing them, the facts about oil changes are clear: consistent preventive maintenance is one of the highest-return habits you can build. A litre of top-up oil costs very little compared to the alternative.
Use what you find to take action. Top up with the correct spec, swap the oil filter, or book a full change. Performance Cars Parts stocks compatible engine oils and filters for a wide range of performance and turbocharged vehicles at performancecarsparts.co.uk.
Bookmark this guide and build that fortnightly check into your routine, especially if your car sees track time.
Conclusion
Checking your car’s oil doesn’t have to be intimidating. With just a few minutes and the dipstick already built into your engine, you can stay ahead of costly repairs and keep your car running smoothly for years to come. Remember the key takeaways: always check your oil on a cool engine, read the dipstick carefully for both level and color, and never ignore signs that a change is overdue.
This one small habit can make a huge difference in the life of your vehicle. So the next time you’re about to hit the road, take five minutes to pop the hood and check that oil. Your engine will thank you, and your wallet will too.
Start today. Grab your owner’s manual, locate your dipstick, and make oil checks a regular part of your routine. You’ve got this.