Most people searching for performance upgrades for their car assume tuning stages work like a menu. Pick Stage 1 for modest gains, jump to Stage 2 if you want more, or go straight to Stage 3 if budget allows. That assumption is wrong, and acting on it can cause serious engine damage.
Tuning stages are a dependency chain. Each stage has specific hardware prerequisites that must be in place before a remap is loaded onto your ECU. Skip those prerequisites and you are not simply limiting your gains; you are running a calibration your engine cannot safely support.
This guide cuts through the marketing language and explains exactly what each stage requires, what it actually delivers, and why the order matters. You will learn what Stage 1 involves and what to check before booking a remap, which hardware components Stage 2 genuinely requires and why each one exists, and how Stage 3 moves into fuelling and internal engine work. You will also learn why the same stage label means different things at different tuners, and how to choose the right stage for your specific car and goals.
What Tuning Stages Actually Are (And What They Are Not)
Tuning stages are a sequential dependency chain, not a menu of options you can pick from in any order. Each stage assumes everything in the previous stage is already in place. Skipping that logic does not produce a milder version of the result you want; it produces a miscalibrated engine operating under conditions it was never built to handle.
The word “stage” is also a commercial label, not a regulated industry standard. No governing body defines what hardware must be present for a build to qualify as Stage 1, 2, or 3. One tuner’s Stage 2 package may include components another tuner reserves for Stage 3. This makes the label unreliable on its own. Before booking any remap or sourcing performance car upgrades, always ask for the hardware list, not just the stage number. For a detailed breakdown of how the three stages compare in practice, see Stage 1 vs Stage 2 vs Stage 3 Tuning: What’s the Difference?
Understanding the sequential dependency chain is the single most important concept to grasp before spending any money on tuning. Manufacturers deliberately leave performance headroom in the factory ECU calibration. They do this to satisfy emissions targets across multiple markets, protect warranty coverage, and ensure the engine behaves reliably on varying fuel grades and in different climates. Stage 1 recovers that headroom through software, and every subsequent stage builds on it.
One further point that catches many buyers out: two cars with identical factory power figures can be fundamentally different underneath. The same quoted output can come from different turbocharger specifications, injector sizing, thermal limits, and software architectures depending on the model year or market variant. Stage definitions applied generically across models, without accounting for those differences, are meaningless at best and damaging at worst.
Stage 1 Tuning: Software Only, Stock Hardware Required
With that headroom recovered in principle, Stage 1 is where every build must begin in practice.
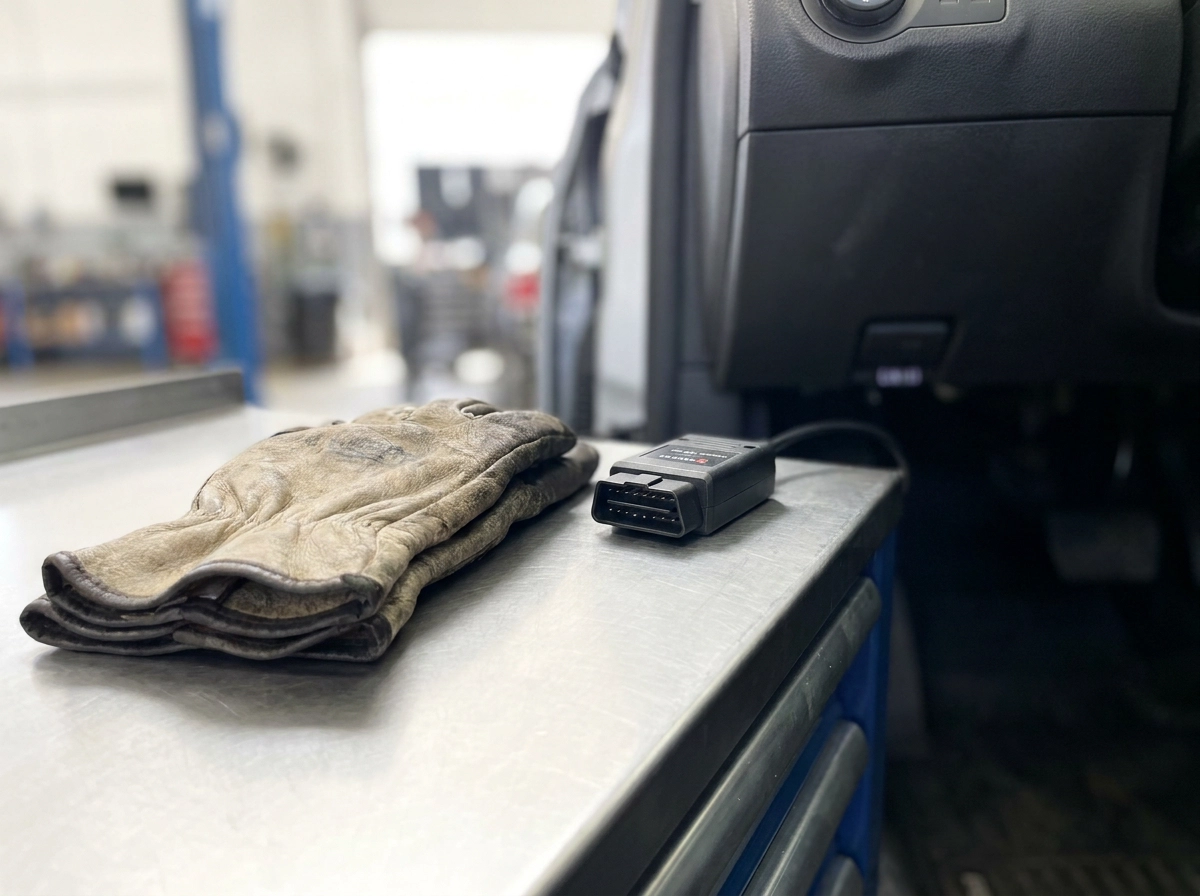
A Stage 1 remap is a software-only modification. The tuner reads the original calibration from the ECU via the OBD port, adjusts the fuel delivery maps, ignition timing advance, and boost pressure targets, then writes the revised map back. No parts are removed, no hardware is added. The car leaves looking identical to how it arrived.
Those three parameters are where the manufacturer’s deliberate conservatism lives. Factory calibrations are written to tolerate poor fuel, infrequent servicing, and extreme climates. Tightening the targets within the hardware’s actual capability is what a Stage 1 remap does.
What gains are realistic?
On a turbocharged petrol engine, 20 to 30 percent increases in both power and torque are a credible expectation from a well-executed remap on a healthy car. Torque gains are often felt first, arriving earlier in the rev range. Naturally aspirated engines have no boost pressure to raise, so gains are more modest, typically 5 to 10 percent through optimised fuelling and timing alone.
The prerequisite is engine condition, not hardware
Worn spark plugs, a blocked air filter, failing sensors, or sub-standard fuel will each corrupt the calibration. The map is written to assume a mechanically sound, stock engine. If the engine cannot consistently meet the conditions the new map requests, the gains evaporate and engine stress increases.
This is also why Stage 1 tuning is the only responsible entry point for any car performance upgrade journey. Applying a Stage 2 map to stock hardware does not produce a milder Stage 2 result; it produces overboost the stock intercooler cannot cool, charge temperatures that trigger detonation, and potential damage to pistons or the turbo. Stage 2 prerequisites are covered in the next section precisely because they must exist before any Stage 2 calibration is written.
Stage 1 Prerequisites: What to Check Before You Book a Remap
A healthy engine is the foundation a Stage 1 calibration is written for. Before you book a remap, work through each of the following checks; skipping any one can corrupt the results or cause damage once the new map is live.
Service consumables must be current. Spark plugs, air filter, engine oil, and fuel filter all need to be within service specification. A calibration written for a healthy combustion environment will be undermined by worn plugs misfiring under increased ignition advance or restricted airflow through a clogged filter. Any credible tuner will ask about recent service history before proceeding.
Scan for ECU fault codes before you travel. Use an OBD-II diagnostic tool to check for stored or pending codes and resolve every one before your appointment. A remap does not fix underlying mechanical faults; an engine already signalling problems will behave unpredictably once boost and fuelling targets are raised.
Confirm your fuel grade. Most Stage 1 maps for turbocharged petrol engines are calibrated on premium fuel. Running lower-grade fuel after a remap can cause the ECU to retard timing, reducing the gains the calibration was designed to deliver. Confirm with your tuner which fuel grade their map assumes.
Inspect all boost-related pipework. Check intercooler hoses, boost pipes, and vacuum lines for cracks, splits, or loose clips. Even a small boost leak prevents the calibration from holding its target pressure consistently, so dyno results will not match real-world performance. If you are later considering a performance exhaust upgrade and wondering whether it needs a remap, the same principle applies: hardware integrity must be confirmed before any calibration work begins.
Document your exact specification. Identical model codes can conceal meaningful differences in turbo hardware, injector sizing, or engine management software between production years. Provide your tuner with your VIN, build date, and any factory options relevant to the drivetrain, so the map is written for your specific car rather than a generic variant.
Stage 2 Tuning: Why Hardware Must Come Before the Remap
Once your Stage 1 prerequisites are confirmed and your baseline remap is in place, the next level of modification requires a fundamentally different approach.
Stage 2 is not simply a more aggressive version of a Stage 1 map. It is a calibration written specifically around hardware modifications that must already be fitted before the tuner opens the software. The stock ECU was never designed to manage the airflow characteristics of a modified induction, intercooler, and exhaust system, which is precisely why the hardware must come first.
The core hardware requirements are an uprated induction kit, an intercooler, a performance exhaust system, and an EGR delete or remap on diesel applications; each component is covered in detail in the Stage 2 Hardware Prerequisites section below.
On a properly prepared turbocharged platform, a Stage 2 remap typically delivers gains of 25 to 45 percent in power and 30 to 50 percent in torque over stock figures, though the exact outcome depends on the engine family, turbo sizing, and specific hardware fitted. Not sure which stage suits your build? The Stage 1, Stage 2 or Stage 3? guide covers this by platform.
One common mistake is fitting all the Stage 2 hardware and then leaving a Stage 1 map in place. The car will not reach its potential, and the calibration will be mismatched to the new airflow characteristics of the modified system. Hardware and map must be developed together.
Stage 2 Hardware Prerequisites: What You Need and Why Each Part Matters
Here is what each component does and why it cannot be skipped.
Induction kit or high-flow air filter. The stock air filter and intake tract are sized for factory airflow targets. An uprated induction kit reduces restriction upstream of the turbo, allowing the compressor to draw greater air volume at a lower pressure drop. The Stage 2 calibration is written with this improved flow in mind; without it, the map requests boost the intake cannot support cleanly.
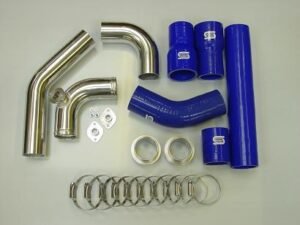
Uprated intercooler. The factory intercooler is sized for stock boost and temperature limits. A Stage 2 map raises boost pressure, which directly raises charge air temperature. An undersized intercooler heat-soaks under sustained load, reducing air density and creating conditions for detonation. If you are asking do I need an intercooler for Stage 2, the answer is yes; it is not optional.
Performance exhaust system including a high-flow downpipe. Back pressure downstream of the turbo forces the turbine to work harder, slowing spool and raising exhaust gas temperatures. A performance downpipe and cat-back system reduce that resistance, improving turbine efficiency and enabling the faster spool the Stage 2 calibration assumes. The map is written around these changed flow characteristics, not the stock exhaust.
EGR delete or remap (diesel applications). The exhaust gas recirculation system feeds soot-laden gases back into the intake, reducing the volume of clean air available at higher power levels. Stage 2 diesel calibrations are built on the assumption that this restriction has been removed or addressed via a software remap of the EGR function.
Before you book the mapping session, every component must be fully installed, leak-tested, and confirmed operational. Your tuner will check this on the day. Arriving with partially fitted or untested parts wastes the session and your money.
Stage 3 Tuning: When the Engine Itself Has to Change
Where Stage 2 upgrades the supporting systems around the engine, Stage 3 changes the engine itself. The hardware involved is substantial and is fully enumerated in the Stage 3 Prerequisites section below; what matters here is understanding the character of this work before committing to it.
The mapping process at this level is iterative. A tuner does not write a complete map and run the car to peak power in a single session. Instead, the power curve is developed incrementally across multiple rolling road sessions, with knock, lambda, and exhaust gas temperature data validated at each step before progressing further. The margins for error at Stage 3 are narrow, and a single uncorrected knock event at high boost can destroy components that took weeks to assemble.
Stage 3 changes are not easily reversed. Once internals are replaced and a larger turbo is fitted, the vehicle has a fundamentally different reliability profile, fuel consumption, and maintenance schedule. It is a purpose-modified machine, not a road car with an aggressive software tune.
Specialist supervision is not optional here. The tuner must have direct, documented experience with the specific engine family and must be capable of reading and responding to live data in real time.
Power gains vary too widely for a meaningful percentage. Some builds double factory output; others target modest headroom above Stage 2 to preserve reliability. The turbo selection, fuelling hardware, and structural limits of the bottom end determine the ceiling, not a generic stage label.
Stage 3 Prerequisites: Fuelling, Internals, and Forced Induction Upgrades
With the scope of changes established, here is exactly what must be in place before calibration begins.
Turbocharger. The factory turbo is sized for stock airflow and fuelling targets. At Stage 3 power levels it becomes the primary restriction in the entire system. A correctly specified hybrid or aftermarket unit must be selected based on the engine’s displacement, the intended power target, and the RPM range where that power needs to arrive. Fit the wrong turbo and you either run out of flow before the target or sacrifice low-end response entirely.
Injectors and fuel pump. Higher boost means higher airflow, and the fuelling must match it precisely. Stock injectors running at Stage 3 boost targets cannot supply sufficient fuel volume, and the result is a lean air-fuel mixture. A lean mixture at high boost causes detonation, and detonation damages pistons. Larger injectors and an uprated high-pressure fuel pump are prerequisites, not upgrades to consider later.
Forged pistons and connecting rods. Factory cast pistons carry a modest safety margin above stock cylinder pressures. Stage 3 calibrations exceed that margin routinely. Replacing internals before the build costs a fraction of what an engine rebuild costs after a failure under boost. This is not a cost-saving area.
Cooling system. Increased combustion pressures and sustained wide-open-throttle runs generate heat loads the factory cooling circuit was not designed to manage. An uprated radiator and a performance thermostat are required to keep temperatures within safe operating limits across a full rolling road session.
Documentation and process. Every modification on the list must be verified by the tuner before calibration starts. Iterative rolling road sessions, live lambda monitoring, knock logging, and exhaust gas temperature checks are core parts of the Stage 3 process, not optional additions to consider once the map is written.
What Actually Happens When You Skip a Stage’s Prerequisites
The mechanism is straightforward. A Stage 2 map instructs the ECU to request boost targets and fuel delivery rates that assume an uprated intercooler and a free-flowing exhaust are already in place. Fit that map to a stock car and the increased boost pressure sends charge air temperatures beyond what the factory intercooler can cool. The result is heat soak, and heat soak leads directly to detonation: the hot, compressed charge ignites before the spark event rather than after it. A single sustained wide-open-throttle run under those conditions can damage pistons, rings, and bearings. This is not a theoretical risk; it is the most common outcome tuners report when a car arrives having been mapped without the supporting hardware fitted first.
At Stage 3, the most dangerous omission is the fuelling upgrade. Running stock injectors against Stage 3 boost targets creates a lean air-fuel mixture. A lean mixture at high boost is not a performance compromise; it is a failure mode. The engine may not survive one full-throttle pull before the pistons are damaged beyond repair.
The financial exposure extends beyond the repair bill. In the UK, all modifications must be declared to your insurer. An incorrectly staged build that suffers engine damage may complicate or invalidate an insurance claim — check your policy and declare all modifications. Understanding which performance parts deliver genuine, safe gains before committing to a map is therefore both a mechanical and a financial decision.
MOT compliance adds a further layer of risk at Stage 2 and above. Removing a catalytic converter will trigger an emissions failure on a standard MOT test, and any modification affecting exhaust noise or structural integrity is subject to the tester’s discretion. A decat downpipe belongs on a track or dedicated-use vehicle, not a daily driver presented for a standard test.
Why Stage Names Mean Different Things at Different Tuners
Beyond the safety and legal risks covered above, there is a more fundamental problem with stage tuning terminology: no governing body defines what any of these labels actually mean.
There is no industry standard, no regulatory framework, and no professional association that specifies which hardware must be present before a build qualifies as Stage 1, Stage 2, or Stage 3. The labels are commercial packages created by individual tuning providers, and they vary significantly between businesses. One tuner’s Stage 2 may include components another places firmly in Stage 3. A third may use entirely different terminology altogether.
This matters enormously when buying a used modified car. A classified listing describing a car as “Stage 2 tuned” tells a prospective buyer almost nothing useful without supporting documentation. It does not confirm which intercooler is fitted, which exhaust system was used, which ECU calibration version is currently installed, or critically, whether the hardware was present before the map was written or bolted on afterwards.
When evaluating any modified car or comparing tuning packages, request the following as a minimum:
- The name, version, and date of the ECU calibration
- The make and model of every hardware component fitted
- Confirmation that each component was installed and verified before the mapping session
Credible tuners are increasingly moving away from generic stage labels in favour of itemised build documentation, precisely because two cars carrying the same stage name can have entirely different hardware, fuelling limits, and reliability profiles. This shift reflects a more mature understanding of how individualised tuning genuinely works.
The practical rule for anyone researching performance tuning upgrades is straightforward: evaluate every package by its hardware list, not its stage number. If a tuner cannot provide a clear, itemised specification of what physical modifications are included and why each one is present, treat that as a red flag, regardless of which stage they are offering.
Realistic Cost Versus Gain: What Each Stage Actually Delivers
Knowing what a stage label means is only half the equation. Understanding what it costs, and what you realistically get back, is what turns that knowledge into a sensible decision.
Stage 1 offers the strongest return on investment of any modification available for a turbocharged car. A Stage 1 remap costs vary by platform and tuner; get a quote specific to your car. In exchange, gains of 20 to 30 percent in both power and torque are achievable. No other single modification comes close to that ratio.
Stage 2 requires a larger upfront commitment. Budget a meaningful sum for the intercooler, induction, and exhaust hardware — costs vary widely by platform and component spec. For guidance on choosing the right exhaust components as part of that hardware build, the Exhaust Replacement Guide: OEM vs Performance Upgrades for UK Drivers covers the key decisions in detail. The rolling road remap adds further cost; bespoke sessions vary by tuner and platform.
Stage 3 is a different financial category entirely. Turbocharger, fuelling hardware, internal engine work, and iterative rolling road calibration represent a significant budget commitment that varies greatly by platform and power target. Budget it as a complete engine project, not an incremental upgrade.
At every stage, dyno validation is essential. A before-and-after rolling road print confirms the calibration is delivering expected gains and that no knock, lambda errors, or temperature anomalies are present at peak power. Credible tuners treat this as standard, not optional.
The financial case for doing prerequisites correctly is unambiguous. Engine rebuilds on performance platforms are expensive, far exceeding the price of the intercooler or injectors that were skipped. The prerequisite hardware is always cheaper than the damage it prevents.
How to Choose the Right Stage for Your Car and Your Goals
Knowing what each stage costs is only useful once you know which stage is actually right for your build. Here is a straightforward framework.
If your car is stock or near-stock, begin with Stage 1. There is no valid reason to skip it and purchase Stage 2 hardware first. Stage 1 establishes the calibration baseline and, critically, confirms whether your engine is healthy enough to support further modification. A tuner working through a Stage 1 session will identify boost leaks, sensor faults, and fuelling inconsistencies that would undermine any subsequent work.
Progress to Stage 2 only once every required hardware component has been sourced, fitted, and tested. Treat the hardware as the entry requirement, not a follow-up task. Before booking the mapping session, ask your tuner for their exact hardware specification list for your platform. What one tuner includes in Stage 2 another may place in Stage 3, so confirming the precise component assumptions in advance prevents wasted sessions and miscalibrated maps.
Stage 3 is a committed project, not an escalation. Consider it only if your power target genuinely exceeds what the stock turbo can flow, your budget realistically covers both hardware and multiple rolling road sessions, and you accept that daily usability, fuel economy, and service intervals will all shift substantially.
For road cars that also see occasional track use, a properly executed Stage 2 on a well-suited platform represents the most practical balance. It delivers meaningful performance car upgrades, remains driveable daily, and avoids the reliability trade-offs that define Stage 3 builds.
When selecting a tuner, evaluate their experience with your specific engine family, their use of live data logging during calibration, and their willingness to provide a written hardware specification list. Quoted peak power figures alone tell you very little about calibration quality or safety.
The Right Stage Is the One You Have Actually Built For
Every choice covered in this guide leads to the same principle: the correct stage is not the highest number you can afford, it is the one your car’s hardware already supports.
As covered throughout this guide, the dependency chain is fixed and there are no shortcuts within it.
A stage label without a hardware list is meaningless. Before committing to any build or purchasing a used modified car, ask for written documentation of every component fitted and confirmation that each part was installed before the map was written, not added afterwards.
Before booking a mapping session, source the hardware prerequisites for your intended stage. The engine, force induction, exhaust, and heating and cooling categories at performancecarsparts.co.uk cover the components each stage requires. Build first, then map.
Conclusion
Build first, then map.
Visit performancecarsparts.co.uk and build the foundation your target stage genuinely requires. The gains will follow.