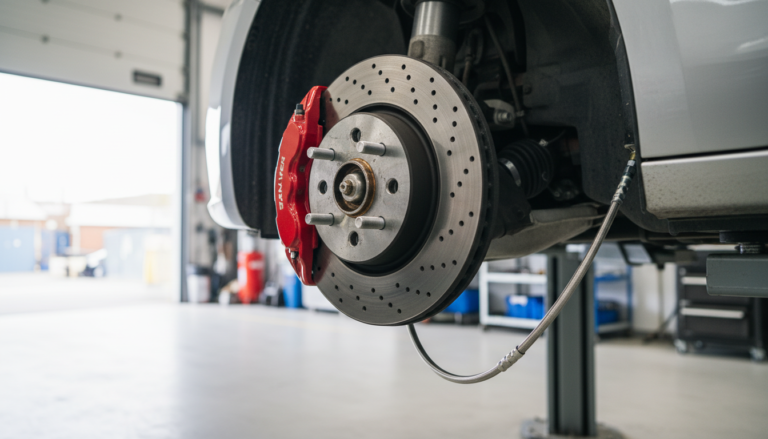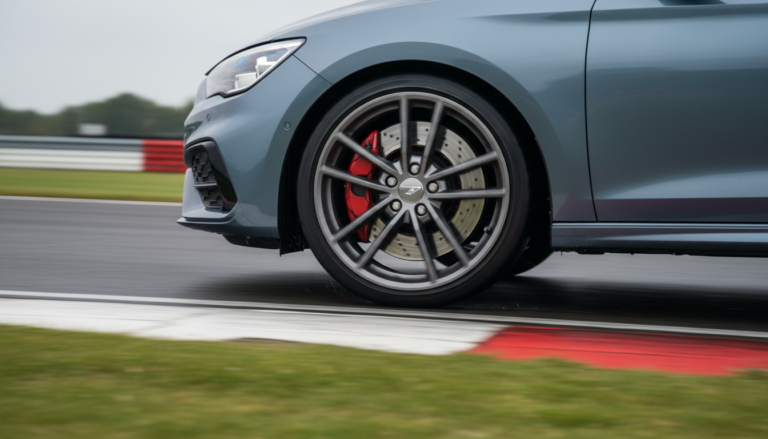
You have spent good money on new pads and discs, fitted them carefully and torqued everything up. Then, a few hundred miles later, the pedal feels vague, the steering wheel shimmers under braking or the pads squeal at every junction. In many cases the parts are fine. The problem is that nobody bedded them in.
Bedding in (also called burnishing or breaking in) is the process of mating fresh pad material to the disc face and laying down an even transfer film of pad material on the disc. Get it right and you get a consistent pedal, stronger bite and quieter brakes. Get it wrong, or skip it and go straight into hard stops, and you risk uneven deposits, glazed pads and the vibration many drivers blame on “warped discs”.
This guide explains how to bed in brake pads and discs for UK road cars and track day cars, why the procedure differs between fast road and race compounds, what manufacturers actually recommend, how to tell when the job is done and which MOT and legal points are worth knowing before you choose a pad.
Quick Answer: How Should You Bed In Your Brakes?
There is no single bedding-in procedure that suits every pad. The right approach depends on the pad compound, whether the discs are new or used, and whether the car spends its life on the road or on circuit. Use the table below as a starting point, then follow the instructions that came with your pads.
| Your car and driving | Recommended starting point | Main compromise |
|---|---|---|
| Daily driver with OE-style or fast road pads | A series of moderate stops from town speeds on a quiet road, then gentle driving for the first few hundred miles | Full performance takes time to arrive; avoid emergency-style stops early on where you can |
| Fast road car that does the odd track day | Road bed first, then a short heat cycle at the start of the first track session | Some fast road compounds take a long time to bed fully and may not suit circuit use at all |
| Dedicated track day pads that are road approved | Manufacturer’s staged heat-cycle procedure, often finished at the circuit, followed by a proper cool-down | Needs space, time and attention; can be noisy and dusty on the road |
| Race-only pads (not road approved) | Bedded at the circuit only, using the pad maker’s track procedure | Cannot legally be used on public roads in the UK and Europe |
Final choice of procedure depends on the pad manufacturer’s instructions and correct fitment for your car. Browse our performance brake pads by vehicle to find the right compound. This guide covers disc brakes on cars only.
What Bedding In Actually Does
Most modern performance brakes rely on two kinds of friction working together. The first is abrasive: the pad physically rubs against the iron of the disc. The second is adherent: a thin layer of pad material sticks to the disc face, and the pad then grips that layer. A properly bedded disc carries an even, light grey film of pad material across the whole swept area, which is why the pedal feels consistent from stop to stop.
New parts do not start like that. Fresh pads are flat but rarely perfectly matched to the disc, and new discs often carry a protective coating or machining marks. Bedding in does three jobs at once:
- Mating the surfaces. The pad wears into the shape of the disc until it contacts across nearly the full face, rather than on a few high spots.
- Curing the pad. Many pads contain resins and binders that give off gases the first time they get hot. Bringing them up to temperature in a controlled way burns these off before you need full braking.
- Laying down the transfer film. Moderate heat, applied evenly, deposits a uniform layer of pad material on the disc. That even layer is what gives a smooth, strong pedal.
When this goes wrong, the transfer layer builds up unevenly. Because the pad grips deposited material differently from bare iron, patchy deposits make braking force rise and fall as the disc turns. Drivers feel that as judder through the pedal and steering wheel, which is why “warped discs” are often really unevenly coated discs. Thickness variation from wear or poor fitting can cause the same symptom, so it pays to rule out both.
Before You Start: Fitting Checks That Make Bedding Work
No bedding procedure will fix a poor installation. Before your first drive, run through these points:
- Clean hub faces. Rust or scale between hub and disc causes run-out, which leads to uneven pad contact and judder. Clean the mating face back to bare metal.
- Clean the new discs. Remove any protective oil or coating using brake cleaner, unless the disc manufacturer says the coating is designed to wear off in use.
- Fit pads with the correct shims and hardware. Lubricate only the contact points the manufacturer specifies, and keep grease well away from the friction surfaces. Contaminated pads or discs are an MOT failure as well as a safety issue.
- Torque the caliper bolts and wheel nuts to your vehicle manufacturer’s figures, tightening wheel nuts in a cross pattern. There is no universal torque figure, so use the data for your car.
- Check fluid and pedal. Pump the pedal several times before moving the car so the pistons push the pads onto the discs. If you have opened the hydraulic system, bleed it properly first; our guide to DOT 4 vs DOT 5.1 brake fluid for track days explains which fluid suits your use.
If you are also changing disc type, our explainer on grooved, drilled and dimpled performance brake discs covers how each design behaves, and the full range of performance brake discs is listed by size and fitment.
How to Bed In Brake Pads on the Road: Step by Step
For OE-style, fast road and many road-legal sports pads, bedding starts on the road. Manufacturers word their procedures differently, so treat the steps below as a general outline and use your pad maker’s figures where they give them.
1. Choose the right place
You need a quiet road with good visibility and nothing close behind you. An industrial estate on a Sunday morning or an empty dual carriageway slip area is far better than a busy A-road. Never bed in brakes in a way that puts other road users at risk or breaks the speed limit.
2. Warm the brakes gently
Make a few light stops to confirm the pedal is firm and the car pulls up straight. This also gets some initial heat into the pads and discs.
3. Run a series of moderate stops
Repeat a set of firm but progressive stops in fairly quick succession, so the discs stay warm between them. As an example, UK brand Probite suggests slowing from around 25–35 mph to walking pace 8–10 times, with no more than a minute or two between stops, in its guide to bedding in new brakes. The aim is to heat the parts evenly, not to stop the car dead.
4. Avoid coming to a complete stop while hot
Where it is safe, slow down rather than stopping fully, and do not sit at a standstill with your foot pressed hard on the pedal after the series. Clamping hot pads against one spot on a hot disc can leave a pad-shaped deposit, which is a classic cause of judder later.
5. Cool down and drive gently
Drive for a few minutes using the brakes as little as possible so everything cools evenly. Then treat the first few hundred miles as part of the process. Brembo, for example, describes a bedding period of about 300 km after fitting new pads and discs and advises avoiding sudden, forceful stops during that time, according to its bedding-in guidance.
Some pads come with a bedding coating that does part of the work for you. EBC says several of its street compounds are largely self-bedding over roughly the first 100 miles, but it still recommends waiting until around 300 miles before driving hard, as set out in its bedding-in article. Other brands give different distances, so check the instructions for your pads.
Bedding In New Brake Discs vs Reusing Old Ones
- New pads and new discs. The best case. Both surfaces start flat and clean, so the pad can square up to the disc quickly and lay down a fresh, even film.
- New pads on used discs. Many people do this, but used discs usually have a worn lip at the edge, some surface wear and the previous pad’s transfer layer. The new pad has to wear into that profile, and mixing compounds can affect feel until the old deposit has been replaced. If the discs are near their minimum thickness or have a deep lip, replacing them is usually the better choice.
- Different compound on old discs. Moving from a road pad to a track compound on the same discs can be slower to settle, because the existing film came from a different material. A longer bed and some patience usually sort it.
A useful visual check from EBC’s guidance on new discs is to look at the contact band after each round of stops. It should spread across the disc face until it covers close to the whole swept area. Until it does, the pad is only working on part of the disc and you should hold back from hard driving.
Track Day Brake Bedding: Fast Road vs Track Pads
Track compounds are designed to work at much higher temperatures than road pads, and many need a deliberate heat cycle before they deliver full performance.
Fast road pads on track
Not every fast road pad is meant for circuit use. EBC, for instance, says its Yellowstuff compound is not recommended for track days because its bedding process is too long, and points track drivers to Bluestuff or its race pads instead. If you plan more than the occasional session, check that the pad maker supports track use for your chosen compound. Our EBC brake pads guide compares the main EBC compounds side by side.
Road-legal track pads
Pads that can be driven to the circuit, used in anger and driven home often have a two-stage procedure: a pre-bed on the road, then a hotter cycle at the track. EBC describes Bluestuff this way and suggests using temperature-indicating paint on the disc edge to confirm the pads have passed the target temperature. It also recommends a long cool-down afterwards, ideally overnight, before racing.
A typical circuit bedding routine
Driving coaches at Driver61 set out a sensible general approach in their guide to bedding brakes on a track or test day. In summary:
- Leave the pit lane gently, stay off the racing line and let faster cars by.
- Make several light, progressively firmer applications to check the pedal and build initial heat.
- On straights, accelerate briskly then brake firmly to scrub off around half of your speed, without stopping or locking the wheels, and accelerate away again. Repeat this cycle several times, with the number depending on the car’s weight.
- Expect a burning smell or a little fade towards the end of the cycle; manufacturers describe this as normal while resins burn off.
- Do a cool-down lap with as little braking as possible, then come in and avoid holding the car on the footbrake in the pit lane.
Always follow circuit rules and marshal instructions, and check with the organiser before doing anything that differs from normal lapping.
Race-only pads
Pure race compounds are bedded at the circuit and are not designed or approved for road use. Some sintered race pads need little more than a few gentle stops to seat the pad to the disc, according to their makers. Because they cannot legally be used on the road, they suit trailered track cars rather than cars driven to the circuit.
How to Tell Your Brakes Are Properly Bedded
Once the parts have cooled, look and feel for these signs:
- An even grey or slightly blue-tinted film across the full swept area of each disc, with no bright, untouched bands or dark blotches.
- Full pad contact. The pad face should look evenly used rather than shiny at one edge.
- A consistent pedal. Bite should be the same from the first stop to the tenth, with no pulsing through the pedal or steering.
- Straight-line stops. The car should not pull to one side under braking.
Patchy marks, a pad-shaped imprint on the disc or vibration under light braking suggest uneven deposits. Some manufacturers suggest repeating the bedding cycle in that case, as a fresh, even heat cycle can sometimes clean up a light deposit. Heavy deposits, glazing or vibration that does not clear may mean the discs need skimming or replacing, so get them checked.
Common Bedding-In Mistakes and Brake Judder Causes
- Going straight into hard braking. An emergency-style stop on cold, fresh pads can overheat the surface before it has cured and leave an uneven layer.
- Holding the brakes on when hot. Sitting at lights or in the pit lane with the pedal pressed after a hard run is one of the commonest causes of deposits.
- Skipping hub cleaning. Run-out from rust on the hub face makes the disc wobble slightly, so the pad touches it unevenly on each revolution.
- Contamination. Grease, copper paste or fluid on the friction surfaces ruins the bed. Contaminated pads usually need replacing.
- Wrong pad for the job. A cold-biting road pad used hard on track may fade and glaze; a high-temperature track pad used only for short trips may never get warm enough to work at its best.
- Old or tired fluid. A soft or long pedal after a track session is often fluid boiling, not a bedding problem. EBC suggests changing fluid every two years for road use and much more often for regular track days.
If the pedal feels soft even after a good bed, look at the hydraulics: fresh high-temperature fluid and braided hoses are the usual next steps alongside pads and discs.
Brake Pad Upgrades for Popular UK Tuned Cars
Bedding procedure is driven by the pad compound rather than the car, but some platforms have specific points to check. Use the table below as a list of questions to answer before you buy and bed new pads.
| Vehicle family | What owners should check |
|---|---|
| VW Golf GTI / Golf R / Audi S3 | Which caliper and disc size your car has, as these vary by model, year and option pack; whether the pad compound is approved for track use if you plan circuit days |
| Honda Civic Type R (FK2 / FK8 / FL5) | Front and rear pad shapes for your generation; whether you need a road-approved pad or a track-only compound; condition of the existing discs before fitting new pads |
| Toyota GR Yaris | Whether your car has the standard or upgraded brake package, which affects pad fitment; pad maker’s track bedding procedure if you lap the car regularly |
| BMW 3 Series E9x / 1 Series | Front and rear part numbers for your exact model and brake option; heavier cars may need more bedding cycles on track |
| Ford Fiesta ST / Focus ST | Caliper and disc size for your generation; whether hub faces are rusty, a common cause of run-out on older road cars |
Examples from our range
- EBC Yellowstuff street and track brake pads for the Golf 8 R and Audi A3 – a fast road compound; check EBC’s guidance on track suitability before circuit use.
- Ferodo DS2500 front brake pads for Civic Type R FK2, FK8 and FL5 – check the listing and Ferodo’s bedding instructions for your intended use.
- EBC Yellowstuff fast road front brake pads for the Toyota GR Yaris – confirm fitment against your brake package.
- Pagid Street+ front brake pads for the BMW 3 Series E9x – match the part number to your model and brake size.
UK MOT, R90 Approval and Legality
Bedding itself has no legal implications, but your choice of pad and the condition of your brakes do. Uprated parts may also need declaring to your insurer, so check your policy.
R90 approved brake pads
UN ECE Regulation 90 sets the standard for replacement brake pads and discs sold for road vehicles in Europe and the UK. It tests replacement parts against the original equipment so that braking performance and balance stay within set limits. EBC’s explainer on ECE Regulation 90 notes that some race compounds exceed R90’s friction limits and are therefore not approved for road use in Europe. In practice, if a pad is listed as race-only or “not for road use”, keep it for track cars that are trailered to events. Check for the approval marking and the manufacturer’s road-use statement before fitting a pad to a road car.
What the MOT checks
The DVSA’s MOT inspection manual brake section includes several items that relate directly to pads, discs and how well they have been fitted and bedded:
- Pads worn to the wear indicator are a major defect, and pads worn below 1.5 mm are dangerous.
- Pads or discs contaminated with oil or grease are a major defect.
- Discs that are significantly and obviously worn are a major defect, and discs that are insecure or fractured are dangerous.
- On the brake test, an imbalance between wheels on the same axle can fail the car, with a stricter dangerous threshold on a steered axle.
Freshly fitted pads that have not bedded evenly can sometimes produce uneven readings on a roller brake tester, so it makes sense to complete the bedding process and a few hundred miles of normal driving before an MOT where you can.
Brake Bedding Checklist: Before You Buy and Fit
- Confirm pad and disc fitment for your exact model, year and brake package.
- Choose a compound that suits how you drive: road only, fast road with occasional track, or dedicated track.
- Check the pad is road approved if the car is driven on public roads.
- Decide whether to replace the discs; worn or lipped discs slow bedding and can cause noise.
- Clean hub faces and new discs, and keep grease off friction surfaces.
- Torque caliper bolts and wheel nuts to your manufacturer’s figures.
- Pump the pedal before driving and check fluid level and condition.
- Follow the pad maker’s bedding procedure, on a quiet road or at the circuit as appropriate.
- Avoid holding the brakes on when they are hot and allow a proper cool-down.
- Inspect the disc faces for an even film and drive gently for the distance the manufacturer recommends.
Shop Brake Pads, Brake Discs and Brake Kits

Conclusion
Knowing how to bed in brake pads properly is one of the cheapest ways to get the most from a brake upgrade. The principle is the same whatever you drive: clean, correct fitting, a series of controlled heat cycles, no holding the brakes on while hot and a proper cool-down. The details, from the number of stops to the distance before you drive hard, depend on the compound, so the pad manufacturer’s instructions always take priority over general advice.
Do it carefully and your new pads and discs will give the consistent pedal, strong bite and quiet running they were designed for, whether you are commuting on the M25 or chasing lap times at Brands Hatch.
Ready to upgrade? Browse our performance brake pads and big brake kits at performancecarsparts.co.uk. If you are not sure which compound or part number suits your car, message the team on WhatsApp or send us an email with your registration and how you use the car, and we will help you get the fitment right.
Shop related performance parts

Explore related products



Always check the individual product listing for your vehicle and engine before ordering.