
Conventional wisdom says wrapping your headers frees up horsepower by lowering bay temperatures and densifying the intake charge. That story persists because it sounds plausible, not because it survives scrutiny on a lap timer. Treat exhaust wrap as what it actually is: a thermal barrier that protects components, stabilises temperatures and buys you consistency, not a shortcut to power. Get the material selection, air gap rules and prep wrong, however, and you can trap moisture against mild steel and accelerate cracking instead of preventing it. This tutorial works through the problem rather than the myth, starting with what radiant heat actually does to wiring, hoses and floor pans on a track car, then moving into the practical decisions: direct contact versus air gap, wrap ratings for mild and stainless steel, what to wrap on the manifold and downpipe, and what to shield instead. We will also cover surface prep and coating before fitting, the real risks of over-wrapping, and how to check suitability before you buy. One caution up front: the moisture debate around exhaust wrap is not settled in the sources available, so we will flag what is contested rather than repeat confident claims.
Start With the Problem, Not the Horsepower
Exhaust wrap and exhaust system heat shields are often sold as shortcuts to power. Treat them instead as heat management: they protect components and help keep temperatures more consistent lap to lap. They do not replace intake, fuelling or tuning work, and they are not proven standalone power adders. Any change in under-bonnet conditions is a side effect, not a horsepower claim.
A track car punishes heat harder than a road car. Exhaust gas temperatures stay high under sustained load, under-bonnet airflow is poor when queuing in the paddock or pit lane, and repeated heat cycles stress nearby wiring, hoses and floor pans. SAE notes typical under-bonnet operating temperatures up to 225°C, rising to 300°C with EGR in higher-temperature engine designs, which shows why proximity matters (SAE technical paper). That is not a wrap measurement; it is a warning about the environment.
Separate two jobs. First, keeping heat inside the exhaust manifold and pipe can support gas velocity. Second, keeping radiant heat away from looms, fuel lines, coolant hoses and the cabin floor is component protection. These need different products and different fitment rules.
Be clear about evidence: the research set contains no measured before-and-after temperature data for wrap or shielding on a track car. This section explains mechanisms and manufacturer guidance rather than inventing figures or repeating unverified dyno claims. The “free horsepower” story is therefore not a basis for purchase. If you are fitting or reworking the exhaust while adding protection, use suitable fixings and check our guide to exhaust clamps so the system stays secure and serviceable.
What Radiant Heat Actually Does to a Track Car
Having established that radiant heat is the enemy of consistency rather than a source of free power, it pays to trace exactly where that damage occurs. The exhaust manifold and downpipe radiate heat in every direction, and the components closest to them suffer first. Wiring and sensor looms are particularly vulnerable: sustained heat hardens insulation, makes connectors brittle and can alter resistance in sensor circuits, causing signal drift. The correct fix is rerouting or shielding the loom, never wrapping it tightly against the pipe. It is worth assessing whether other heat-related upgrades belong on your list alongside this work, as covered in this guide to performance parts that transform your car.
Hoses and fluid lines follow the same logic. Coolant, oil, boost and fuel lines all degrade under radiant heat, and a reflective sleeve that maintains an air gap suits them better than direct-contact wrap. Floor pans and transmission tunnels soak up heat through the bulkhead and floor, raising cabin temperatures, softening underseal and wearing down driver comfort over a long track day. Intake and under-bonnet air suffer too: hot exhaust components heat the bay when the car is stationary or slow, heat-soaking the intake side and undermining consistent intake temperatures once you are back on track.
Finally, inspect clearance before choosing any product. Some products are designed for direct exhaust contact while others require an air gap, so check the datasheet rather than assuming. Brake lines, ABS sensors, engine mounts and suspension bushes can all suffer from proximity to a hot manifold or downpipe.
Direct Contact vs Air Gap: The Rule to Get Right
The damage mechanisms above all share one root cause: radiant heat reaching a surface it should not. Preventing that comes down to a single practical distinction that manufacturers build their products around, and it is the one you must confirm before buying anything. Some exhaust system heat shield products are designed for direct contact with the exhaust, while others require an air gap. Check the datasheet, not the marketing image.
How Air-Gap Shields Work
An air-gap exhaust system heat shield reflects radiant heat and traps a still-air layer between itself and the hot surface. Still air is a poor conductor, so that gap does the insulating. Crush the gap by clamping the shield tight against the pipe or the floor, and you create a heat bridge: the shield now conducts heat straight into the very component it was meant to protect. Standoff and clearance are functional requirements, not cosmetic ones.
How Direct-Contact Wraps Differ
Direct-contact wraps and sleeves work by a different route. Heat conducts into the wrap, then convects away from its outer surface. That balance depends on the wrap being fitted as the manufacturer intends. Over-tensioning, adding multiple layers beyond the specification, or trapping dirt and oil in the weave all change how the pipe sheds heat, which matters on a car seeing repeated heat cycles.
Test-Fit Before You Buy or Cut
Mock up the route first. Check clearance to steering components, suspension, hoses, wiring and the floor, and confirm the product fits without rubbing or being compressed in service.
Do Not Mix Approaches Blindly
Wrapping a pipe and then clamping a reflective shield directly on top of the wrap seems logical but may defeat both products. Unless the manufacturer confirms the combination is intended, treat it as unproven. Getting this rule right also supports stable under-bonnet temperatures, which is where a properly shielded cold air intake setup benefits most.
Material Choice: Mild Steel, Stainless and Wrap Ratings
Having settled direct contact versus air gap, the next decision is what you are covering. Mild steel exhaust manifolds are the most vulnerable. Wrap can trap moisture against plain steel and accelerate corrosion or cracking, particularly on cars used for short runs, stored damp or subjected to repeated heat cycles. Stainless systems tolerate heat differently but are not immune to thermal fatigue. Confirm the grade and wall thickness, and check whether the manufacturer permits wrapping a stainless manifold or downpipe before you cover it.
Compare wrap materials by continuous temperature rating and intended use, not by appearance. Fibreglass, basalt, silica and titanium-finish products are not interchangeable, and a shiny finish is not evidence of better heat management. Look for a datasheet that states the continuous rating, peak rating and contact requirements for the specific location.
Coating is a separate decision from wrapping. A high-temperature coating can protect mild steel from moisture and corrosion, but it must be fully cured to the coating maker’s schedule and confirmed compatible with the wrap before the pipe is covered. Trapping solvent or moisture under wrap is a known risk.
Use stainless ties, clamps and fixings appropriate to the location. Plastic ties, poor-quality clamps and loose ends will fail near an exhaust manifold and can create a new hazard. If the manifold or downpipe is already beyond saving, our Exhaust Replacement Guide: OEM vs Performance Upgrades for UK Drivers covers replacement options before you add heat management. With the material and fixings settled, the next question is which sections to wrap and which to shield.
What to Wrap: Exhaust Manifold, Downpipe and Hot Side
Material choice sets the rules, but it does not decide the strategy: that comes from the thermal topology of the car. Wrap the exhaust manifold and downpipe where radiant heat is actually reaching wiring, hoses, the bulkhead or the floor, not simply because wrapping is seen as a performance upgrade. Establish the target first, then buy the wrap. If you are still mapping the system, our exhaust parts UK guide breaks down component functions and legal considerations before you commit.
Manifold and Downpipe
On the manifold and downpipe, follow the wrap manufacturer’s specified overlap and tension rather than improvising. Running the wrap too tight crushes the pipe’s ability to shed heat; too loose and it rubs through. Keep the wrap clear of moving parts, and plan the route so sensor bosses, drain plugs and flange joints stay accessible for maintenance. Wrapping over an O2 sensor boss, for example, adds service time for no thermal benefit.
Turbo Hot Side
On a turbo car, treat the hot side and downpipe as a separate heat source in their own right. Your research confirmed that separate turbo heat shields and exhaust wraps exist as distinct product categories, so do not assume a manifold wrap is suitable for a turbo hot side or blanket application. Check the product rating for that specific location and confirm whether it is direct-contact or air-gap fitment.
What Not to Wrap
Do not wrap catalytic converters, flexible joints or any section the manufacturer says must remain uncovered. Equally, do not use wrap to hide cracks, leaks or thin metal. Covering a failing part conceals the damage until it becomes a roadside failure.
Mock Up First
Plan the finish before fitting. Loose ends, uneven overlap and wrap that fouls the steering column or bulkhead look poor and may fail. Mock up the entire route dry, check clearance at full lock and suspension travel, then commit.
What to Shield Instead: Wiring, Hoses, Floor Pans and Intake
Wrapping the manifold and downpipe protects what sits close to the pipe. Some components should never be wrapped at all.
Wiring and ECU looms. Reroute looms away from the exhaust where possible. If that is not practical, use reflective sleeving or a standoff bracket that holds the loom clear of the hot surface. An exhaust system heat shield or reflective barrier is usually the correct tool: wrapping a loom tight against the pipe traps heat in the conductors and makes inspection harder.
Coolant, oil, boost and fuel hoses. Use heat sleeving or a reflective sleeve that maintains an air gap over the hose. Replace any hose that has already hardened, cracked or swollen. A fuel hose that has lost flexibility will not be saved by a sleeve. When selecting replacement cooling components, check the temperature rating against the exhaust-side heat load.
Floor pans and transmission tunnels. Fit an underbody reflective shield with an air gap to reduce heat soak through the floor and bulkhead. Do not stick insulation directly to a damp or contaminated floor: it traps moisture and promotes corrosion. Clean and dry the surface before fitting anything.
Intake side. Keep the filter, airbox and intake pipe shielded from exhaust-side radiant heat. Do not wrap the intake pipe in a way that holds heat in. Separation matters more than covering everything.
Secondary components. Inspect brake lines, ABS wiring, engine mounts and suspension bushes. A hot exhaust manifold degrades parts that are not obviously part of the exhaust system, and a clearance check costs nothing.
With the shielding route planned, the pipe itself still needs correct preparation before any wrap is fitted.

Prep and Coating Before Fitting Exhaust Wrap
With the shielding decisions made, the pipe itself needs the right preparation. None of it is optional on a track car that sees repeated heat cycles.
Clean and degrease the exhaust manifold or downpipe thoroughly. Remove loose rust and repair any cracks before any wrap goes on. Covering a failing part makes the failure harder to see and harder to fix. If you are replacing the manifold as part of this work, choosing the right exhaust pipe covers material and diameter in detail.
Coat bare mild steel with a high-temperature coating where appropriate. Allow the full cure time stated by the coating manufacturer before wrapping. Trapping solvent or moisture under wrap is a known risk.
Handle wrap with gloves and eye protection. Follow the manufacturer’s guidance on wet or dry installation. The sources are not unanimous: some manufacturers, such as Cool It Thermo-Tec, state that dry installation is the correct and recommended method and warn that trapped moisture can lead to corrosion and fatigue, while conceding that some installers prefer soaking the wrap. No test data accompanies that claim. Regardless of method, any moisture used during fitting must be able to dry out fully before the car is run hard.
Pre-fit and mark the wrap route. Leave access to flanges, sensors and fasteners. Secure the ends with stainless ties or clamps rather than relying on tension alone.
Inspect the finished job for gaps, loose ends and contact with hoses or wiring. A neat, well-supported wrap is easier to check at service time and less likely to rub through.
The Hard Warning: Over-Wrapping, Moisture and Hidden Failures
Proper prep and coating give the wrap the best chance of doing its job, but they cannot make a bad application safe. This is where the job most often goes wrong.
The Moisture Question Is Unresolved
Whether wrap traps moisture is genuinely contested. One camp argues it holds water against mild steel and hastens rust and rot. A 2025 vendor video countered that wraps do not hold moisture, and commenters on that same post disagreed, citing wrapped headers that had corroded badly. Treat this as an open question, not a settled one, and plan for the pessimistic case.
Over-Wrapping Traps Heat in the Pipe
Too many layers, or a crush-fit that compresses the wrap, keep the pipe hotter internally and reduce its ability to shed heat. The outside surface may feel cooler while the metal runs hotter, which is a thermal-fatigue risk. More wrap is not more protection.
Corrosion Hides Until It Fails
Wrapping a mild steel manifold that is already thin, cracked, poorly coated or used in damp conditions can accelerate corrosion and conceal it until it becomes a leak or a failure. You cannot inspect what you have covered.
Contamination Is a Fire Risk
Wrap or shielding soaked in oil, fuel or brake fluid can smoulder or burn. Keep it clean and replace contaminated material rather than hoping it will dry out.
The Hard Recommendation
If the metal is questionable, shield the surrounding components instead of wrapping the pipe. Fix the exhaust before adding any heat-management product. In the next section, we will cover how to check suitability and choose parts that match the job.
How to Check Suitability and Choose the Right Parts
With the decision on whether to wrap at all now settled, the buying decision should follow the component, not the marketing. Match the product to the actual job: pipe wrap for the exhaust manifold or downpipe, a component heat shield for wiring and hoses, and a reflective underbody shield for floor pans and transmission tunnels. Treat those as separate categories rather than one universal heat product.
Check the continuous temperature rating against your exhaust gas temperature and the manufacturer’s direct-contact or air-gap requirement. A wrap sold for a naturally aspirated manifold may not be rated for a turbo hot side; a reflective sleeve designed to sit off a hose should not be clamped against it. If the datasheet does not state support for the application, do not fit it.
Measure clearance and plan service access before buying. A shield that cannot be removed without dropping the exhaust is a poor choice for a track car that needs regular inspection, and a wrap route that fouls the steering column or bulkhead will rub through. Mock up the route and confirm fixings are reachable.
Buy from a supplier that stocks exhaust, cooling and motorsport accessories together, so wrap, shielding, fixings and replacement hoses can be matched in one order. Performance Cars Parts sells these categories through its online store and offers email and WhatsApp support. If the manifold itself is beyond saving, its guide to aftermarket exhaust systems covers system types and material choices before you add heat management.
Finally, do not choose a product because of a titanium finish or a cosmetic claim alone. Finish may be part of the sales pitch, but material rating and fitment are what protect the car. If two products look similar, pick the one whose datasheet matches your exhaust gas temperature, contact method and clearance. That is the difference between a heat-management part and a shiny failure.
Conclusion: Protect the Parts, Then Measure
With parts matched to the job, the final discipline is applying that logic consistently: wrap only where radiant heat threatens something sensitive, and shield everything else. An exhaust manifold or downpipe justifies covering where it runs close to wiring, hoses, the bulkhead or floor pan; looms, coolant and oil lines, the floor and the intake side are better protected by a reflective shield with a maintained air gap than by tight wrap. Confirm the direct-contact or air-gap requirement for each product before fitting, and follow the manufacturer’s overlap, tension, cure and clearance instructions without improvisation.
Mild steel demands the right high-temperature coating, cracks repaired first and restraint against over-wrapping. If the manifold is thin, cracked or damp-stored, leave it uncovered and shield the surrounding components instead.
Measurement closes the loop. Log under-bonnet, floor and intake temperatures before and after using a consistent test: same ambient conditions, same warm-up, same measurement points, same interval. That baseline is the only way to judge whether the change delivered lap-to-lap consistency rather than a one-off reading.
Use Performance Cars Parts as a source for exhaust, cooling and motorsport accessory categories when you need matching parts. Keep the installation inspection-friendly, with accessible fixings, secure wrap ends and nothing that traps debris against the pipe, so the protection you have added remains visible at service time.
Shop related performance parts
Explore related products
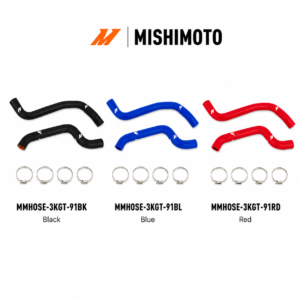
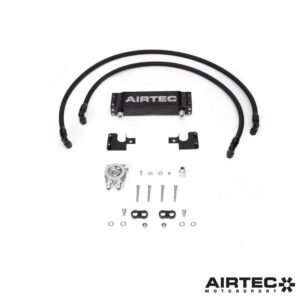
Always check the individual product listing for your vehicle and engine before ordering.