
Most track days do not end with a dramatic engine failure. In our experience, they end with a split coolant hose, a missing clip, or a low tyre. Small, cheap faults, on a car that was running fine when it left the garage. That is why a compact, ranked spares box beats an overstuffed tool chest every time.
And scrutineering is no safety net: as Motorsport UK’s spot-check wording and the Grassroots Motorsports pre-event check video both make plain, the real preparation happens in your garage.
Over the following sections we rank spares by failure likelihood, from coolant and hoses through to belts, plugs and electrical parts. We cover the tools that earn their space, what to leave at home, and how to decide between new parts and known-good spares, so you can rebuild your box around what actually fails.
Why a Ranked Spares Box Beats a Full Toolbox
In our workshop experience, failures that end track days are rarely exotic: a burst coolant hose, a loose undertray, a fastener shaken out, boiled brake fluid, tyre pressures never re-checked. They are cheap, common and time-consuming. Motorsport UK’s vehicle regulations describe pre-event scrutiny as only a spot check of a limited number of safety and eligibility features, which alone will not guarantee compliance. That governs competition events, not track days, but the mindset applies: anything modified or involved in an accident should be re-presented for examination. Track day operators set their own noise, tyre and technical requirements, so confirm these before you pack. Space is the constraint: a road car boot must hold the box, helmet, jack and luggage. The list below is ranked by likelihood of ending your day, not by how impressive the tool looks. For the mandatory safety kit, see our track day safety equipment checklist.
1. Coolant, Hoses and Jubilee Clips
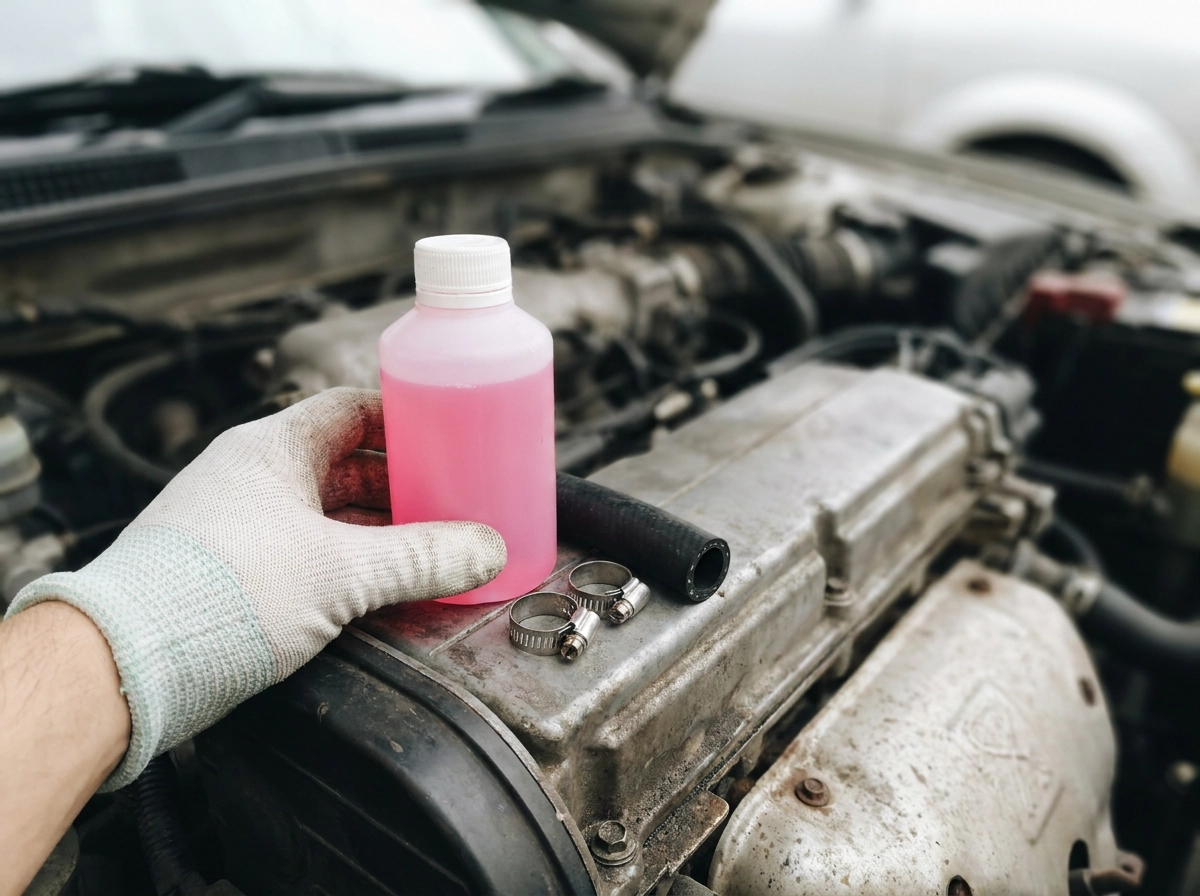
Coolant loss can overheat an engine quickly. A split hose or a jubilee clip that lets go under pressure ends a session because no coolant means no safe running. Carry 1 to 2 litres of premixed coolant in the correct type, a spare hose length, jubilee clips in your engine bay’s actual sizes, distilled water, and a funnel. Buy coolant sealed and fit fresh clips. Performance Cars Parts stocks heating and cooling components and thermostats, so a spare thermostat is worth carrying if yours has stuck before. Keep a serviceable hose removed during a performance parts upgrade, labelled with the date. In our workshop practice, top up with water only to get home, and refill with the correct coolant before driving it again.
2. Engine Oil and a Top-Up Kit
With cooling covered, oil can end the next session. Track heat and load raise consumption and push oil past rings and seals; a low level or flickering pressure warning means stop immediately.
Carry one to two litres of the exact specification, a funnel, spare sump plug and washer, gloves and rags. Buy oil new and sealed. Performance Cars Parts sells engine oil, so match the manufacturer’s spec, not just the filler-cap grade; choose the correct oil filter for your performance car. A sump plug and washer from a previous service are known-good spares; add a filter if changing at the circuit. Check cold before the first session and after each run, adding small increments because overfilling damages as readily as running low.
3. Fixings, Clips and Cable Ties
After oil, the next cheap failure is hardware. Heat cycling and vibration loosen fasteners, and a hanging undertray, splitter, heat shield or trim panel can be flagged at inspection or thrown into a wheel. Carry a small tin of M6 and M8 bolts, nuts, washers and spring washers in your car’s sizes, plus jubilee clips, self-tapping screws and heavy-duty cable ties. Buy fixings fresh: they are cheap, and torque-critical or single-use fasteners should never come from scrap. Keep originals removed when fitting aftermarket parts as known-good spares, sorted and labelled; our Audi parts in the UK guide covers broader upgrade context. A trackside fix only needs to be safe enough to get home. Anything affecting wheel, brake, steering or suspension security is a decision to stop, not a paddock repair.
4. Tape and Sealants
Fixings sorted, tape is the next cheapest session-saver. Carry gaffer tape, self-amalgamating silicone tape for hoses, heat-resistant tape near exhausts or turbos, threadlock and silicone sealant. It holds a split boost hose, slows a weeping coolant line, patches a cracked intake pipe, secures loose trim and keeps wiring off hot manifolds. Buy tape fresh each season: heat makes it brittle, and self-amalgamating tape will not seal once dried. Treat wraps as get-you-home only, not repairs; a taped hose or flapping panel can see an organiser stop you. Wrap rolls flat on card or dowel to prevent tangling. For proper hose and fluid checks, see brake fluid and hose guidance.
5. Tyre Pressure, Wheels and Torque
Tape buys time; wheel security does not. Pressures climb as tyres heat, so road-fine settings run high or unevenly, and poor torque after a wheel change is a safety problem. Carry a reliable gauge, 12V compressor or track pump, valve caps, torque wrench and correct socket, breaker bar and chocks. Record cold pressures, re-check hot with the same gauge; session-to-session consistency beats one target number. Re-torque to the manufacturer’s figure after any wheel change and after the first session, wheel on the ground. Buy new torque wrenches, gauges and bolts with stretched or corroded threads; keep known-good spare nuts and centre caps. See our coilover setup guide after suspension changes.
6. Brake Consumables and Fluid
With wheels torqued and pressures logged, the next weakest link is braking. Brakes work harder per lap than any other system, and pad wear, glazing or boiled fluid typically show as a long pedal, fade or sponginess, not a warning light.
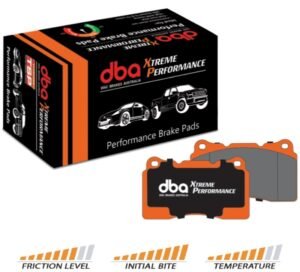
Carry spare front pads in the correct fitment, brake fluid to your car’s specification, a bleed kit and catch bottle, a caliper piston retraction tool, gloves and rags. Buy fluid in a sealed, unopened container, since opened fluid absorbs moisture, and fit fresh pads rather than aged shelf stock. Decent part-worn pads from a previous set are acceptable known-good spares; spare discs only if you can swap them properly. Performance Cars Parts stocks brake components, so match compound and fluid specification to your car and use case, not brand name.
7. Temperature and Pressure Monitoring
Monitoring prevents rather than repairs: an infrared thermometer for tyres, brakes and hubs shows you the number before the car shows you an expensive noise. Add a pyrometer only if you are chasing lap time, and a coolant temperature display if the standard gauge lacks precision. Take readings the moment you pit, at the same point on each tyre or disc, and track trends across sessions rather than chasing absolute values. This kit sits in our motorsport accessories range. Where the budget is tight, a decent infrared thermometer and one good pressure gauge deliver most of the value. With temperatures logged, move on to the electrical spares that keep a session alive.
8. Electrical Spares
Temperature monitoring warns you before a failure; electrical spares deal with faults that give none. A blown fan-circuit fuse, failed relay or loose battery terminal stops a session as effectively as a mechanical fault, and diagnosis is faster with parts to hand.
Carry blade fuses matching your car’s ratings, spare relays and bulbs, insulated wire, crimp connectors, heat-shrink, electrical tape, a small multimeter, and jump leads or a jump pack. Buy fuses, crimps and heat-shrink fresh; they are cheap. A budget multimeter is fine if it works when tested. Known-good relays and sensors from your own car are valid spares if they worked when removed and are labelled. With spares like these, a trackside sensor swap is practical rather than guesswork.
9. Belts, Plugs and Ignition Parts
Electrical faults are usually quick to diagnose; ignition and belt failures are not. A shredding auxiliary belt can take the alternator or water pump with it, while a tired plug or coil pack turns a session into a diagnostic hunt.
Carry a correct-fit auxiliary belt, a spare plug or full set if your engine is hard on them, and a known-good coil pack or ignition module if your car has form there. Buy belts and plugs new: both are wear items with a known service life, so fresh parts avoid repeating the failure. Coils, modules and sensors qualify as known-good only if you tested them working before removal. Engine parts earn space only if you can realistically change them between sessions; otherwise they are weight without benefit.
10. The Tools That Earn Their Space
The same fitability test applies to tools: unusable trackside means wasted weight. Carry socket set and combination spanners in your car’s sizes, breaker bar, pliers, side cutters, screwdrivers, small pry bar, head torch, gloves, cable ties and tyre gauge. For lifting, a jack that fits under your car plus axle stands or chocks, nothing more; you won’t do a clutch change in the paddock. Buy new: torque wrench that holds calibration, a jack you trust, a head torch. Keep known-good: complete socket set spared from your garage. Leave the rolling tool chest at home. It outweighs everything else combined, and most never leaves the drawer. Check what your car needs before packing: the bolt size you never touched on the road is often the one you need trackside.
What to Leave at Home
With the core tool kit settled, leave these at home:
- Spares you cannot fit in time: a clutch, gearbox, driveshaft or turbo, and the tools to fit them, turn the paddock into a workshop and rarely pay off.
- Duplicates: a second socket set, imperial spanners for a metric car, or one of every consumable add weight and steal space from your helmet and jack.
- Repairs you would not trust at speed: taped brake lines, cable-tied suspension parts and patched tyres are not worth the risk, and an organiser can stop you.
- Fuel assumptions: check the organiser’s requirements and environmental limits before bringing jerry cans, and confirm venue fuel arrangements.
- Anything banned or restricted: noise limits, tyre types and timing equipment vary by venue, so read the event instructions.
- Degraded items: old brake fluid, brittle tape, cracked hoses and tyres of unknown age belong in the bin.
New or Known-Good? How to Decide
Having binned the degraded items, sort what remains by provenance. Buy new anything with a shelf life or single-use specification: brake fluid, coolant, engine oil, brake pads, tyres, and stretch or torque-to-yield fasteners. Keep as known-good only parts you have personally run and that carry no expiry: coil packs, sensors, relays, hoses, clips, brackets, and originals removed for upgrades. Never buy used brake fluid, tyres of unknown age or history, or safety-critical fasteners with unknown torque history; the saving is never worth the risk. Label every spare with what it came off, when, and the mileage or hours. Store fluids upright and sealed, tape cool and dry, and electrical spares in a dry tin rather than loose on the boot floor, where they will corrode.
The Box, Summarised
With new versus known-good decided, the box is: Always: premixed coolant, a spare hose and jubilee clips, a litre of engine oil, gaffer and self-amalgamating tape, fixings and cable ties, a pressure gauge and pump, a jack and torque wrench. Car and circuit dependent: spare front pads, brake fluid, an infrared thermometer or temperature gauge, an auxiliary belt, fuses and relays, and one known-good sensor or coil pack. Only with space and real need: a full electrical kit, spare wheels, spare bulbs, and deeper sockets for jobs you have done before. In one line: fluids, fixings, tape, pressure gear, temperature monitoring, and enough tools to change a wheel and top up a fluid. Everything else is optional. Cross-check against the organiser’s event instructions and your car’s known weak points.
The Takeaway: Rank Your Box, Then Rebuild It
The final discipline matters more than the contents. Build from the failure list downwards, adding an item only after a real event proves you needed it. Before the first session and after every one, re-check coolant, oil and tyre pressures, the three things heat and load change most. Confirm the organiser’s noise, tyre and fuel requirements before leaving; Motorsport UK’s spot-check guidance is a reminder that preparation is yours, not the scrutineer’s. Then replace anything used or consumed immediately, so the box is complete weeks before the next event rather than assembled the night before.
Conclusion
A track day spares box works best when it is ranked, not crammed. Start with the failures your car is known for, add items only after a real event proves you need them, and keep fluids, fixings, tape and pressure gear as the always-present core, with the session checks and cross-checks above as your routine. Your next step? Sit down today and write your failure list, build the box from the top down, and test it at your next track day. Preparation is not the stressful part; it is what lets you enjoy the driving.
Shop related performance parts

Explore related products



Always check the individual product listing for your vehicle and engine before ordering.